Paradigm
Paradigm Technology provides software solutions for the LBM industries.
Saberis integrates Paradigm Omni "Web Centerpoint" as well as the desktop version of Centerpoint for Windows & Doors vendors, and the Paradigm Estimate software for building plans "takeoffs".
Paradigm Estimate - General Export Process Steps
This section will show the step-by-step process to get the data from the quote/order system to a folder where you can upload it to SaberisConnect.
- Open your project in the Paradigm Estimate Portal.
-
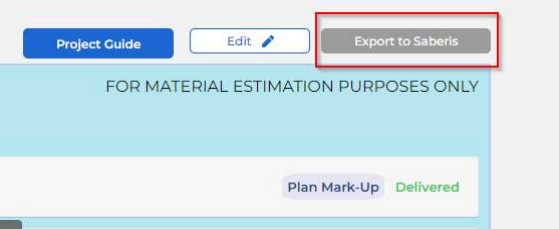
Click on the "Export to Saberis" button located above the Packages Deliverables Section.
-
Enter your SaberisConnect credentials and click on "Export".

- You should receive the message "Successfully exported to Saberis".
- If the results are successful, your processed Paradigm Estimate file will be waiting for you either in your SaberisConnect document list or in your ERP/POS system, if you are directly connected with an API or FTP process, ready to be applied or imported.
Paradigm Omni - General Export Process Steps
-
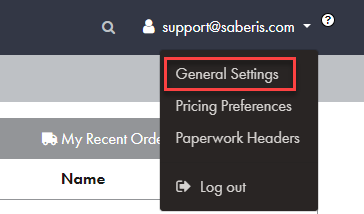
To activate the Saberis export process, first select "General Settings" from your user profile.
-
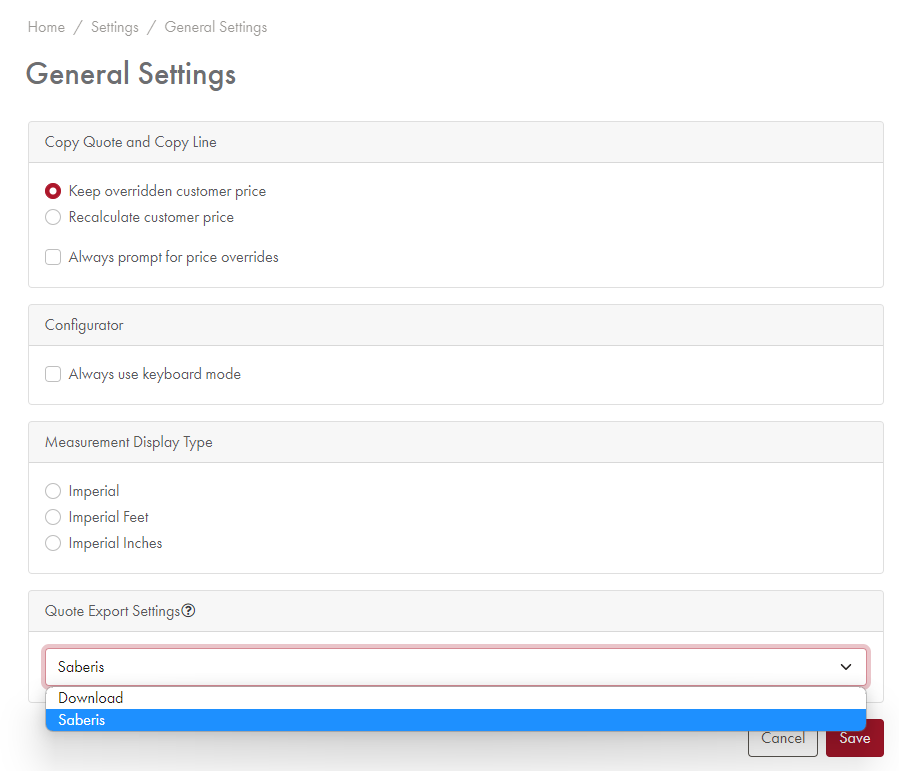
Scroll down in the General Settings to "Quote Export Settings" and select "Saberis", then select "save".
-
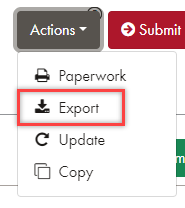
Open a quote. Navigate to the "Actions" button.

-
From the drop down list, select "Export".
-
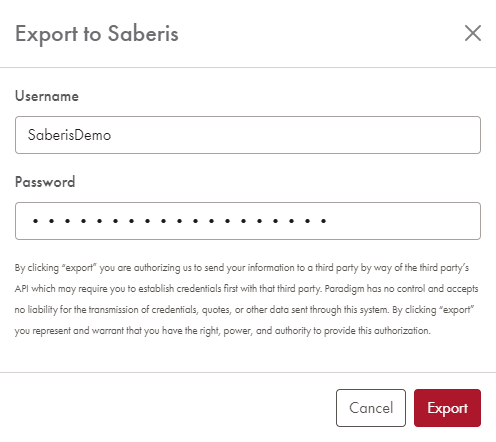
When prompted, enter your SaberisConnect credentials, then select "Export".
-
You should receive a message stating "Quote successfully exported".

Now go to your ERP system if the system is "pulling" down orders from the Saberis Server or if Saberis is "pushing" orders into the system.
If your system does not do the above, then log into your SaberisConnect account and you will see the quote/order already processed and ready for downloading.
If you receive an API error while exporting to SaberisConnect, you can temporarily set the Quote Export Settings to "Download". This allows you to then upload and process the document using the Paradigm module in SaberisConnect.
SaberisConnect integration with the desktop version of Paradigm software requires the downloading of xml files. Please note that at this time, we do not integrate the default xml generated by Paradigm Base Camp.
This section will explain the step-by-step process to get the data from the Paradigm system to a folder where you can upload it to SaberisConnect.
- Bring up the Quote/Order in the Paradigm System.
- Click on the File Menu command.
- Select the Export... command.
- Now select the Export To File... command.
-
When the Save As window pops up, find the folder where you want to save the Vendor files. For example, you might name it VendorSaberisData folder, under the C: Drive root.
You must give the file a name and the extension ".xml", such as PlyGem.xml. Don't forget the dot in ".xml".
If you are saving the file on a server along with other users, add your name to the file name.
Click on the Save button.
Now go to your account on SaberisConnect to complete the task.