Luxwood
Export Filename Source
The file name can consist of up to 4 variables. The default is shown below with:
- User Name
- Export Default Name (Default is LUXWOOD)
- Project Name
- Date plus time (EX: 20170308 plus 1127)
You can delete any of the variables or change their order. If you are saving the export files to a desktop, you don't need the User Name.
Please see your specific ERP/POS system for more suggestions.
Export Default Name
This can be anything you want. You may what to shorten it to LW.
Export Filename Extension Setting
This is used for the Catalyst/Falcon system where the import list can be filtered using a different extension for each Vendor Module.
Use Customer Number
This is not needed by most ERP systems. The BisTrack integration requires this to be populated if you have not set a "company default customer" value in the BisTrack system. If you have multiple locations, you can add default customer numbers by location in your Location Settings.
Sales Type
This is used by BisTrack ERP System. BisTrack by default creates a new sales order. If you want BisTrack to create a new Quote instead, then set this to quote.
Default SKU
A value is required in this field in order to pass the quantity, cost and sell values for each item in the document. This value should match the "special order" or non-stock SKU values created for this vendor in your POS/ERP system.
Use Phrase Mapping
This can reduce the description. It is basically a "find and replace" tool that allows you to abbreviate or blank out unwanted text. See the Phrase Mapping instructions. Once you do this mapping, all orders will be processed using the mapping data you entered.
Use Pricing Cost Factor
This is not needed for this Module. The Cost Price is available, or there is no cost price at all. The cost will be picked up from the ERP database.
Rule for Selling Price
This is set to "Use factored pricing from data". There is probably no selling price. This can be set in the ERP system as a markup on cost, Gross Margin, or even a bottom line amount.
This section will show the step-by-step process to get the data from the quote/order system to a folder where you can upload it to SaberisConnect.
This is based on the latest version of Quote Generator.
-
The first thing the user has to do to use QG to link to SaberisConnect is setup the Export Options.
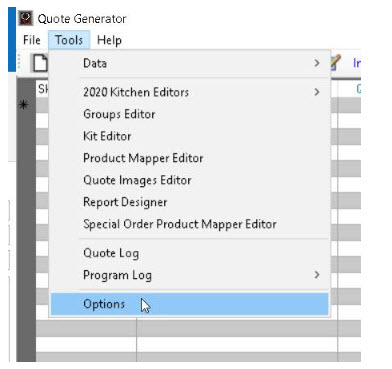
-
Select the correct Default Export format.
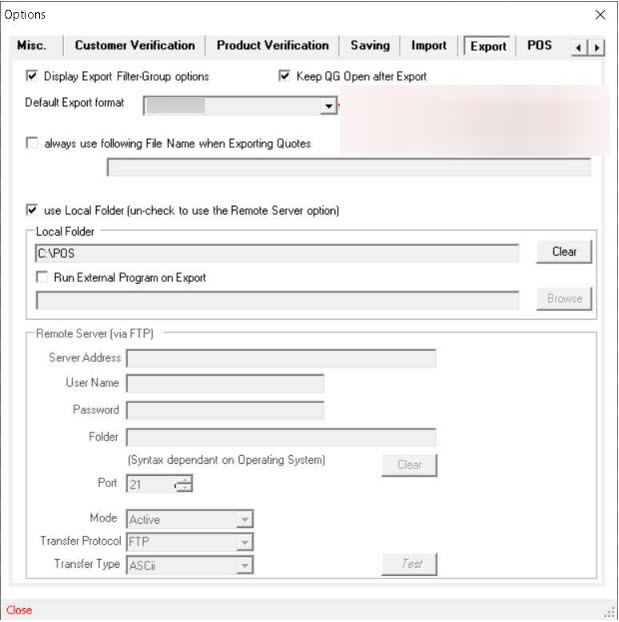
-
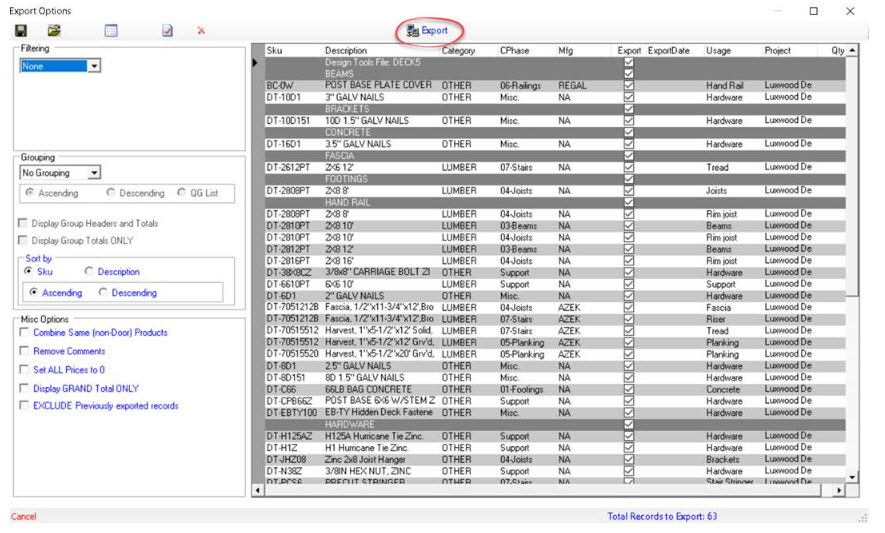
Once these have been set, from then on whenever the user wants to transfer a BOM, they would click on File /Export and the following window opens. Here the user can filter the data, choose certain skus to transfer, holding some back for later etc. When ready, the user clicks Export at the top of the screen and the file is transferred in the file format required by the destination program to the default destination.
Now go to your account in SaberisConnect to complete the task.