Epicor ECS Pro
General Settings
- Allow Unix Filenames: This will purge invalid Unix/Linux characters from export file names.
- Wrap Long Descriptions: If the description is longer than the Max Description Length specified below, text or comment lines will be created until the description is fully accounted for.
- Max Description Length: 32
Export Settings
- Export File Format: Must be Epicor - ECS Pro
-
Export Adapter: None or FTP
None: This will mean that the user will have to manually download the "Processed File" to the Spool folder in ECS Pro. For a browser save, click on the processed file name in the rightside column, and save it to where ECS Pro needs it. If the user has access to the spool folder, then a mapped drive can be created to \ecspro\4.3\databases\escpro.data\spool\. If the ECS Pro version is not 4.3, then change the path. (See Browser Setup for more detailed steps.)
FTP: Using FTP (File Transfer Protocol) can eliminate the need for the user to download the documents. Ask your IT people to set-up a secure FTP server, and then fill in the necessary domain, user name, password, and target path information.
Module Settings
- Please note that the processed filename cannot exceed 64 characters. You can shorten the Default name and/or remove the DateTime stamp. If all users are downloading or using FTP to a single folder on a server, User Name is very important to allow the user to find their file in order to import it.
- There must be a valid ECS Pro special order SKU entered . This can be changed for each order if needed.
- Customer Number: Most users do not check "Use Customer Number". If you do use this option, the user will have the opportunity to change the customer number for each order they process.
If you are using the Saberis FTP to download the Saberis processed files, then you will need to set it to a server address that is accessible from the Saberis Server.
ECS Pro Import Steps:
-
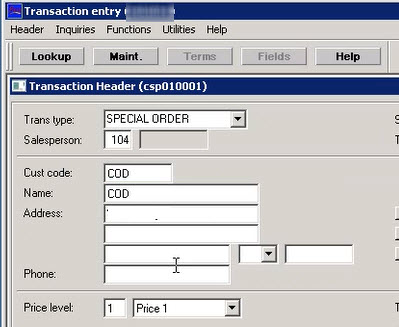
In Transaction Entry, start a new transaction. Select the type and enter the necessary information. Then click on Continue.

-
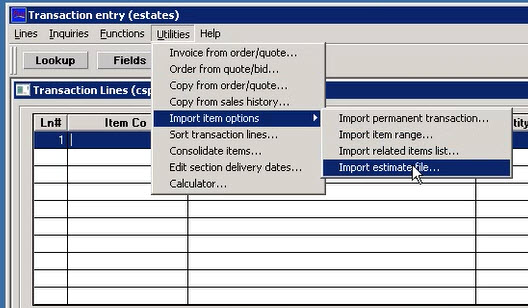
From the Utilities Menu select Import item options, and then Import estimate file...

-
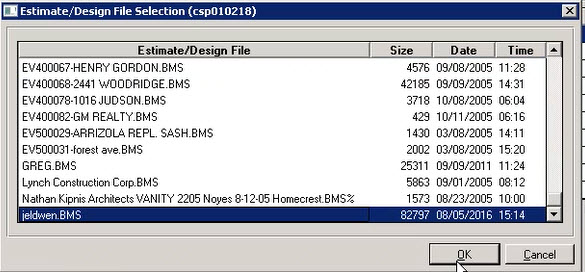
Then select the BMS file for importing.

Now view the transaction items in ECS Pro.